Feeds:
Posts
Comments

Posts Tagged ‘Patina Designs’

elixir

This past week we were able to squeeze in a project over at a new Hip and Cozy Lounge downtown Minneapolis.  Its called Elixir and its located to the left of the Fineline Music Cafe.

I’m calling this Part 1 because I’m going to show you my dark and dusty photos from behind the scenes.  A sort of sneak preview to the venue before its all clean and fabulous.

The Grand Opening will be on May 15th, so we will hope to see you there to celebrate another great establishment by Jado Hark and his team.  I hear the menu is filled with scrumptious goodies and have a feeling I’ll soon be becoming a regular at the new place to eat downtown.

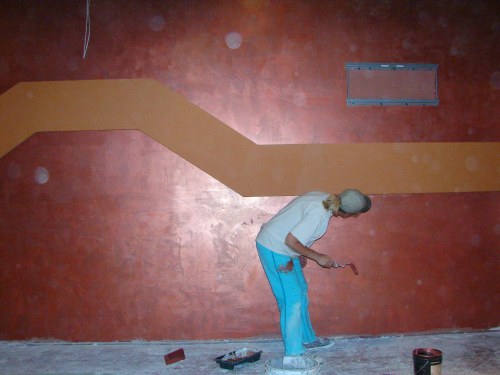
dsc03078Just getting started…

dsc03081Deco Palette Faux Effects

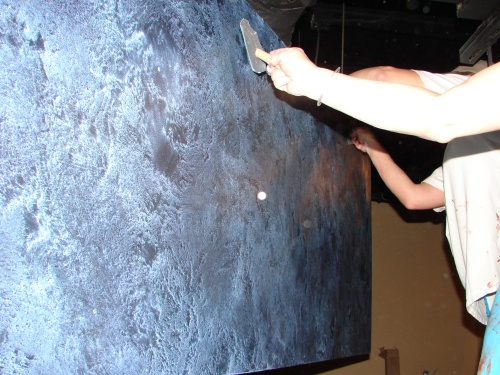
dsc03090Working on one of our signature finishes, “Blue Coral”

dsc03106Finishing up on a Deco Palette/Silkstone Custom finish made unique for Elixir

me-and-terworking on ‘Blue Coral’ Soffit

jadoHandsome Jado in front of Faux Marble beginning stages.

Stay tuned for more pictures…or just go see the real deal on the 15th like everybody else!!!

Read Full Post »

paper-bag1

YES YOU CAN deck your walls out with paper bags if you so choose!!!  Here is one of the many paper bag finishes offer at  Patina Designs.  Terri created a leather look by crumpling up the paper, then treating it like wall paper to adhere to the walls.  Finally, Terri glazed and added some metallic stencils in a random pattern for more DRAMA!!!!

Yay for going Green!

Read Full Post »

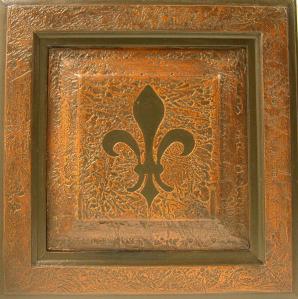
lg_lg-silhouette-and-cork

Silhouette & Cork

Tools:

Wood Icing Textura Paste
tape
black paint
silhouette stencil
Stain and Seal Van Dyke Brown
chip brush
rag
plastic bag
a putty knife

1.) Paint door black and allow to dry

2.) Tape off the areas that you want the black to shine through and apply the silhouette insert where you want it.

3.) Spread the texura base over the entire area and then place plastic over the wet product and pull off to leave peaks and craters.  Make sure to remove the tape immediately.   Pull out your silhouette stencil.

4.) Allow to dry over night and then sand down so the product has smooth edges.  Remove Dust.

5.) Apply stain using a chip brush and then wipe off remaining stain with the rag.

6.) Seal the door after it has dried with c500

All of these products are available at the Plaster Center!!!

Read Full Post »

tissue

http://www.hometips.com/articleimages/20070814094914

Peg’s Tissue Paper glaze recipe


Tools:

Paint – satin or semi gloss

White tissue paper

Soft bristle brush

Stiff bristle stippling brush

Paint tray

Small paint roller

Chip brushes

Technique:

1. Roll paint onto small section of wall (2 x 2)

2. Crumple tissue paper and un-crumple somewhat

3. Lightly apply tissue to wet section of wall and brush over with soft bristle brush

4. Re-roll over tissue paper with paint

5. Work next section, overlapping existing edge

6. Let completely dry

7. Apply glazes in random manner – small section (2 x 2)

8. Stipple with brush to blend colors

Helpful Tips:

Tissue paper usually has a shiny side and a dull side, be sure to be consistent with which side you put onto wall.

Work small area of wall at a time.

Be sure to keep a wet edge.

Read Full Post »

coffee

This Terri’s famous Coffee Grounds Plaster Recipe.  I think you’ll find it quite easy,  and hopefully enjoy yourself when your resorting back to your inner child.  This recipe gives you permission to play with your food once  again…

Here is what you will need:

A trowel
Veniciano Lime Based Plaster
coffee beans
stir stick
coffee bean grinder or blender
coffee maker
sugar and cream to taste

1.) Grind up your coffee beans for your morning pot of coffee.  After brewing remove the coffee grinds and and grind them a second time in the blender or coffee grindercoffee-2

2.) Pour yourself a cup of coffee, mix cream and sugar and enjoy

3.) Run the grinds through the coffee maker again..Remember to empty the pot so as not to overfill.

4.) Grind for a third time, and re-run through the coffee maker again.  You are breaking up the beans with heat and moisture.  The more you grind and boil them, the more of that natural coffee colorant is going to seep out to help color the plaster.  The beans should be soft and paste-like.

5.) Mix the grounds into your plaster and stir till completely mixed in.

6.) Use your stir stick to load your trowel and and put your trowel on your first coat onto the walls.  This is your base coat so do not worry about making it perfect.

7.) After plaster dries, trowel on second coat with desired technique.  Remember to push hard on the beans to break up even more pigment to get a nice rich color.

enjoy the aroma while it lasts…it goes away once the plaster dries!!!

Read Full Post »

dsc02932 Oh have we ever been busy the past two weeks…  Its going to take me quite a bit of time to try and catch everyone back up to speed.

To the left is a picture of one of my esteemed partners Peg Malanaphy, hard at work on a focal wall for a client out in Stillwater.  The wall was done using a technique in which you layer waxes over a top coat to create dimension until you reach your desired color.

You can see in this photo she is on her second layering of wax.

At this same location we also were working very hard at once again taking some dull boring cabinets and making them a beautiful addition to a gorgeous home.

At this particular job we used, Setcoat from the Minneapolis Plaster Center, and then glazed lightly over them to add a nice compliment to the granite counter tops, so the cabinets would not appear to washed out.  dsc02933

(In this picture Peg applies the third layer)

I don’t have any of the finished results photos yet because I spent the last few days of the project getting some much needed rest and relaxation.  I’ll be sure to post them once the girls send them over though.

Hope everyone had a wonderful weekend! love, lulu

Read Full Post »

For those of you trying to sell out there in this..well….we will call it an interesting market, here is a great feature to keep you motivated and inspired.

http://www.frontdoor.com/Sell/10-Things-That-Make-Buyers-Bite/64

I’m smitten with the Entry way photo.  I can’t begin to tell you how many entryway transformations my team and I have done.  This serves as a multipurpose change.  If you’re trying to sell or not, your entry way  is one of the first ways you can welcome folks into your home.  I’d really love to see people painting their front doors a little more artistically.  Perhaps some Damask stenciling, or flavorful artwork.  Why not?

An entry should say: “WELCOME” !!!  This is most easily achieved with something as simple as glorious, magical PAINT!!!  Check out how these folks added some good welcoming vibes to their entry way with some little fluffy clouds…

10-things-buyers-bite_1_entryP.S.  We adore painting clouds…so if you’re in the market for some dreamy ceilings… do call!!!

with painty love, lulu

Read Full Post »

Next Thursday, April 2nd, Peg, Terri and I with Patina Designs are going to be conducting a seminar called “Paint It Green” for the MAFCS annual conference.  Here is the invitation for you!!!  I’ll hope to see you there. xo LULU

gviewgview1

Read Full Post »

dsc02917

For those of you who missed the show today have no fear…I did a nice little jerry-rigging of a tape job back in the green room special just for you!

we are so geeky…it completes me! 

Terri was our spokes gal and did a positively spectacular job.  Peg and I were far too nervous for her to even conceive being on live television but she treated it like a pro as usual.  She was demonstrating one the three eco-friendly demo’s we will be doing on April 2nd at the HEIB conference.  The hosts were divine.. what sweet and wonderful Rebecca and John are!  Thank you so much for making us all feel so comfortable.

dsc02903Terri prepping the hosts for the demo

dsc02908Terri and Peg in the green room before the show

dsc02905some of our latest ventures… this is all concrete
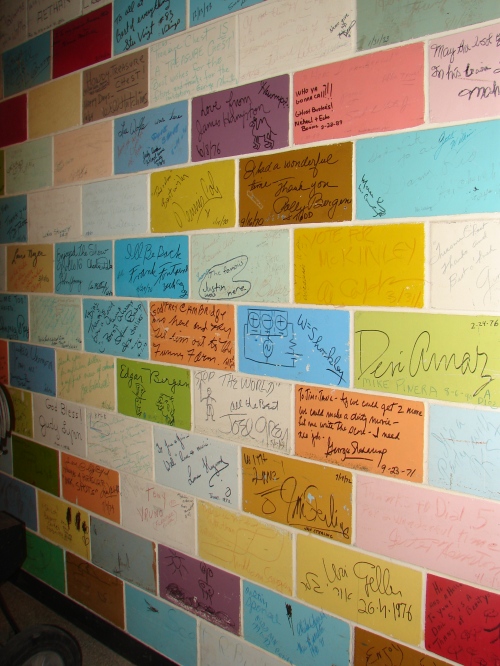
dsc02918Gotta love the colorful wall fit with signatures to boot.

dsc02919I was told my mom would understand this?????

and of coarse…the video!!!

we will have some jazzy stuff up soon.. I’ll be sure to keep you posted.  Many thanks to Gerri, Adam, Jakeums and everyone else that was involved with helping us prepare.

Read Full Post »

Many of you know this already …

bronze_patina(photo from http://www.oldworldfaux.com/images/gallery/1/bronze_patina.jpg)

I’m excited to announce that I have joined forces with a two other women in businesses like mine.  Peg of Interiors of Stillwater, Terri of Addy’s Room and my company LULU Painting are coming together to expand our services and markets.  We can tackle larger jobs, get the work done more quickly and we are giving finishing demonstrations to local groups and organizations.  We are calling ourselves Patina Designs.

We will each hold onto our existing businesses, business names, phone numbers, web sites, etc.

On Monday, Patina Designs will be featured on Twin Cities Live, channel 5 @ 3:00.  We are promoting an upcoming conference we are demonstrating at for MAFCS (Minnesota Association of Family and Consumer Sciences) ((a bunch of homec-ers, around 100 sassy women)) on April 2nd.  I will not be the one in front of the camera (phew), we chose Terri to do that, but Peg and I will be there to cheer her on!

th_6_copper_patina(Copper Patina finish from http://www.paintinganddecoratingconcourse.com/th_6_copper_patina.jpg)

Be on the watch for our upcoming website: patinadesigns.com and keep tabs on our crew here on my blog!  We have a lot of exciting things going on this year that I just can’t wait to share with all of you!

So much Painty love,

LULU

Read Full Post »

Older Posts »